
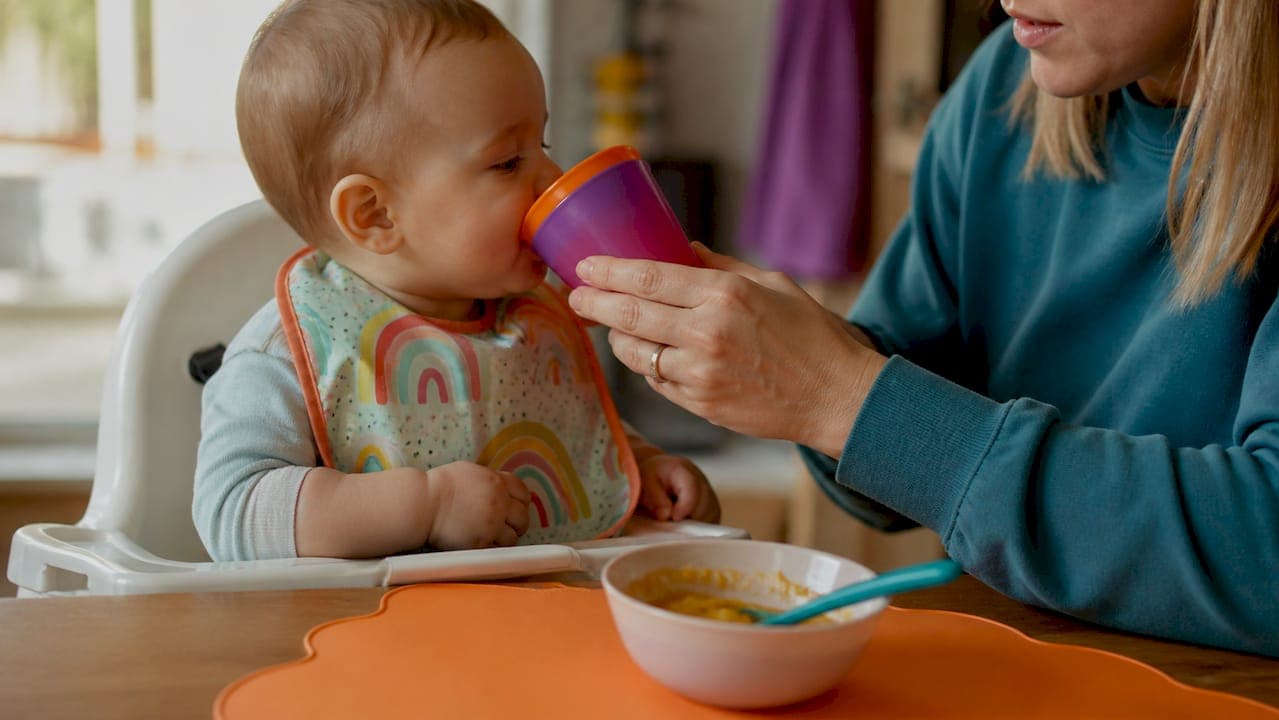
Start open cup training around 6 months, right when solids begin: model a sip yourself, stabilize a small cup against your baby's lower lip, and offer just one or two sip-sized pours. That single sequence, repeated a few times a day, is what actually builds the skill. You don't need special equipment or a set curriculum to begin. You need a few minutes at the table, a cup they can't tip too easily, and a low bar for what counts as success on day one.
Here's what to have within reach before your first attempt:
- A small, lightweight, unbreakable cup (silicone works well for tiny hands)
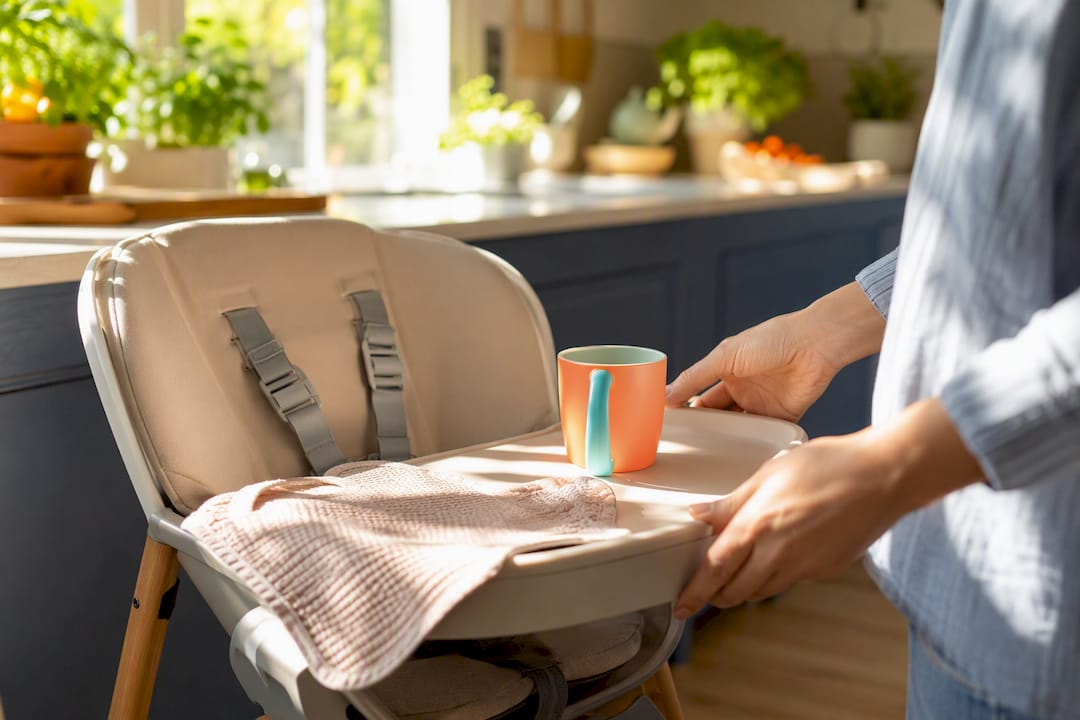
- A towel or bib, because the first few weeks are genuinely wet
- A calm expectation that spills are part of the process, not a sign you're doing it wrong
Key Takeaways
Consistent, low-pressure cup practice started around 6 months, with small pours and a stabilized cup, builds the oral-motor skills that spill-free drinking and clear speech both depend on.
| Point | Details |
|---|---|
| Start early in infancy | Begin open cup practice around when solids typically start, using tiny sip-sized pours and a stabilized cup. |
| Choose the right cup | Pick a small, lightweight, weighted-base cup with handles rather than a valved sippy cup. |
| Expect a long timeline | Spill-free independent drinking often doesn't fully settle until closer to age 2 or 3. |
| Guard beverage timing | Offer water between meals and limit milk or juice to mealtimes to reduce cavity risk. |
| Know when to get help | Persistent gagging, no progress after weeks of practice, or oral-motor delays warrant a feeding therapy evaluation with Thriving Joy. |
Table of Contents
- What Is Open Cup Training, Exactly?
- Why Open Cups Help: The Developmental and Dental Case
- When Should You Start Cup Training?
- How to Choose a Beginner Cup
- Step-by-Step: An Open Cup Training Routine for Mealtimes
- Troubleshooting Common Open Cup Problems
- What Should Go in the Cup? Oral Health and Beverage Guidance
- When Cup Training Signals a Need for Feeding Therapy
- Sources
What Is Open Cup Training, Exactly?
Open cup training is the deliberate practice of teaching an infant or toddler to drink from a cup with no lid, valve, or straw, using small, supervised sips until they can lift, tilt, and control the cup on their own. It's distinct from handing a child a sippy cup and hoping the skill develops on its own. Sippy cups with valves let a baby recreate the same sucking pattern they use on a bottle, so the mouth never has to learn the more complex mechanics of an open rim. Open cup practice forces a different set of movements from the very first sip, which is exactly why pediatric feeding specialists tend to favor it over prolonged sippy use.
Why Open Cups Help: The Developmental and Dental Case
Drinking from an open cup requires a genuinely different set of oral movements than sucking from a bottle or a valved sippy. A baby has to seal their lips around the rim, control the tongue to move liquid backward, and coordinate swallowing with breathing, all while the head and cup are moving. That combination of lip seal and tongue control overlaps directly with the mechanics used in early speech sounds, which is one reason feeding therapists often flag prolonged sippy or bottle use as a factor worth addressing in older toddlers with unclear speech.
The dental case is just as concrete. Valved spouts and open access to milk or juice throughout the day keep sugar in contact with new teeth far longer than a normal mealtime would, and that prolonged exposure raises early cavity risk. Straw cups reduce some of that risk because liquid bypasses the front teeth, but open cups go a step further by encouraging the mature swallow pattern dentists and feeding specialists both want to see established early.
None of this means the first two weeks look graceful. They won't. You're trading a few soaked bibs now for a child who sips confidently, and speaks more clearly, later. That trade is worth making even when the kitchen floor tells a different story at 6:15 p.m.
When Should You Start Cup Training?
Most pediatric feeding resources point to the same window: early infancy when solids typically begin, as explained in cluster feeding bottle fed newborns: what to expect. That timing isn't arbitrary. It lines up with a cluster of developmental changes that make cup practice realistic for the first time, and BabyCenter's guidance on cup versus sippy cup timing reflects the same consensus.
Look for these signs before you dive in:
- Steady head control without support
- The ability to sit upright, even if propped
- Curiosity about your cup or plate at mealtimes
- Willingness to accept a tiny sip without immediate refusal or gagging
If your baby is closer to 9 or 12 months before you start, don't worry that you've missed a window. Later starts still succeed; the process just moves a bit faster because oral-motor control and patience have both matured.
Expect the first sessions to look more like exploration than drinking. Many babies will suck at the rim out of habit rather than sip, and that's normal. Tilt the cup gradually rather than all at once, and let them feel the liquid reach their lips before you pour anything in.
How to Choose a Beginner Cup
The cup itself matters more than most parents expect. A tall glass or a full-size adult cup sets a baby up to fail before they've had a fair shot at the skill. Look for these features instead:
- Small capacity. A cup that holds an ounce or two, similar to a medicine cup, keeps early spills small and manageable.
- Wide, weighted base. A low center of gravity resists tipping when a baby grabs at the rim or knocks the cup with a fist.
- Lightweight, unbreakable material. Silicone flexes instead of shattering and is gentle on new gums during the inevitable chewing phase.
- Two handles or a textured grip. Handles on both sides support the two-hand hold most babies use before they develop one-hand control.
Lidded sippy cups with valves aren't ideal as the primary training cup, because the valve does the sealing work the baby's own lips should be learning to do. If you already own one, removing the valve entirely turns it into a rough open cup and can jolt a reluctant drinker into sipping instead of sucking.
Straw cups and weighted-straw training cups earn their place too, just in a different context. They're a smart choice for the diaper bag or the car seat, where a full spill is a bigger problem than it is at the kitchen table. Straw drinking also builds a useful, complementary set of muscles, front-of-tongue elevation and cheek control, that open cup practice doesn't fully cover on its own. The most functional approach uses both: open cup at the table where mess is contained, straw cup on the go where it isn't.
Step-by-Step: An Open Cup Training Routine for Mealtimes
You don't need a formal lesson plan. You need consistency, and a routine simple enough that you'll actually repeat it three times a day without dreading it.
1. Set up the environment first. Bring your baby to the table, secure them in a high chair or supported seat, and put on a bib. A stable seat matters more than people expect. If a high chair tilts or reclines too far, gravity works against the swallow, not with it, and even the best cup technique will spill more than it needs to.
2. Model it yourself. Take a visible sip from your own cup before you offer theirs. Babies watch mouths closely at this age, and seeing you tilt, sip, and swallow gives them a template to copy.
3. Stabilize the cup at the lower lip. Hold the cup steady against the child's lower lip rather than handing it over loose. This is the single most repeated tip across pediatric feeding guidance, and it works because a wobbling cup guarantees a wobbling sip.
4. Pour just one or two sips. Fill the cup with far less liquid than looks reasonable, an ounce is plenty for a first attempt. A shallow pour means a spill is a few wet drops, not a flooded tray.
5. Tilt gradually and pause. Bring the rim to the lip, tilt slowly, and stop the moment liquid reaches their mouth. Watch for a swallow before tilting further.
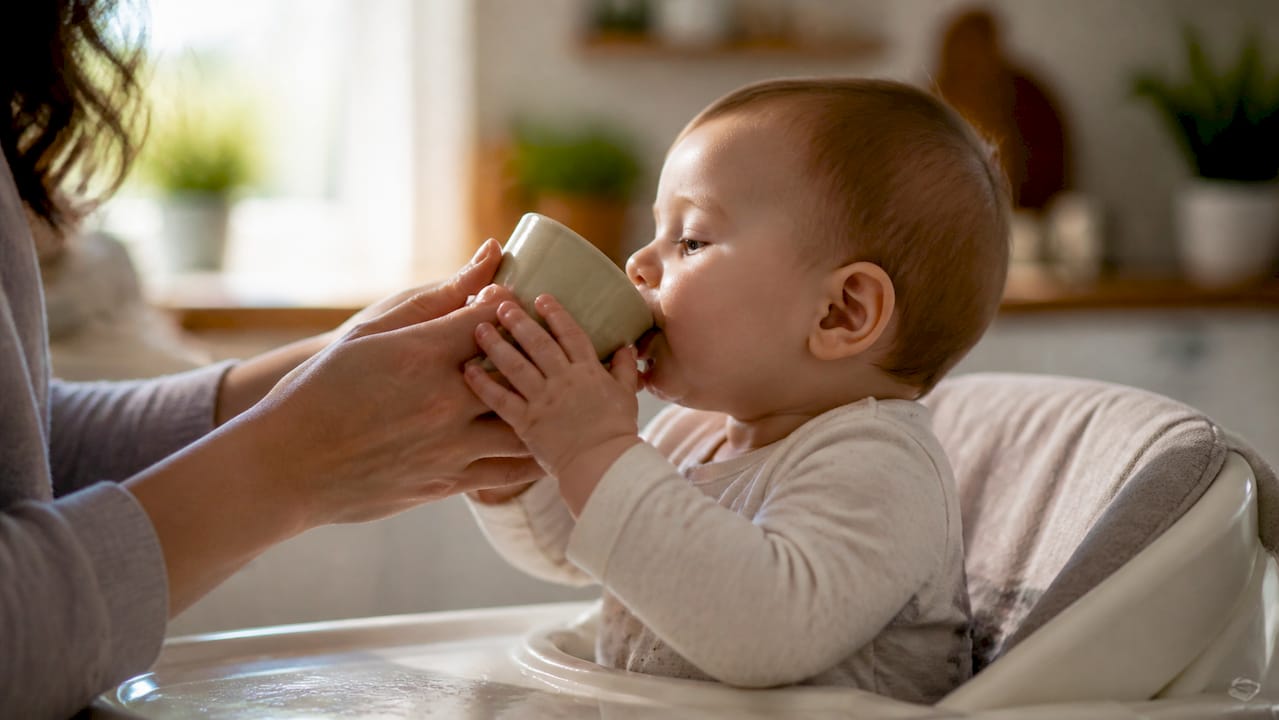
6. Use hand-over-hand support. Once they show interest in holding the cup themselves, wrap your hands around theirs rather than taking over completely. This lets them feel the tilt and weight without losing control of the cup.
7. Keep each practice window short. Ten to thirty seconds of active sipping per attempt is enough at first. Longer sessions just invite frustration on both sides.
8. Repeat two to three times daily. Attach practice to existing meals rather than adding a new routine. Breakfast, lunch, and dinner already happen; the cup just joins them.
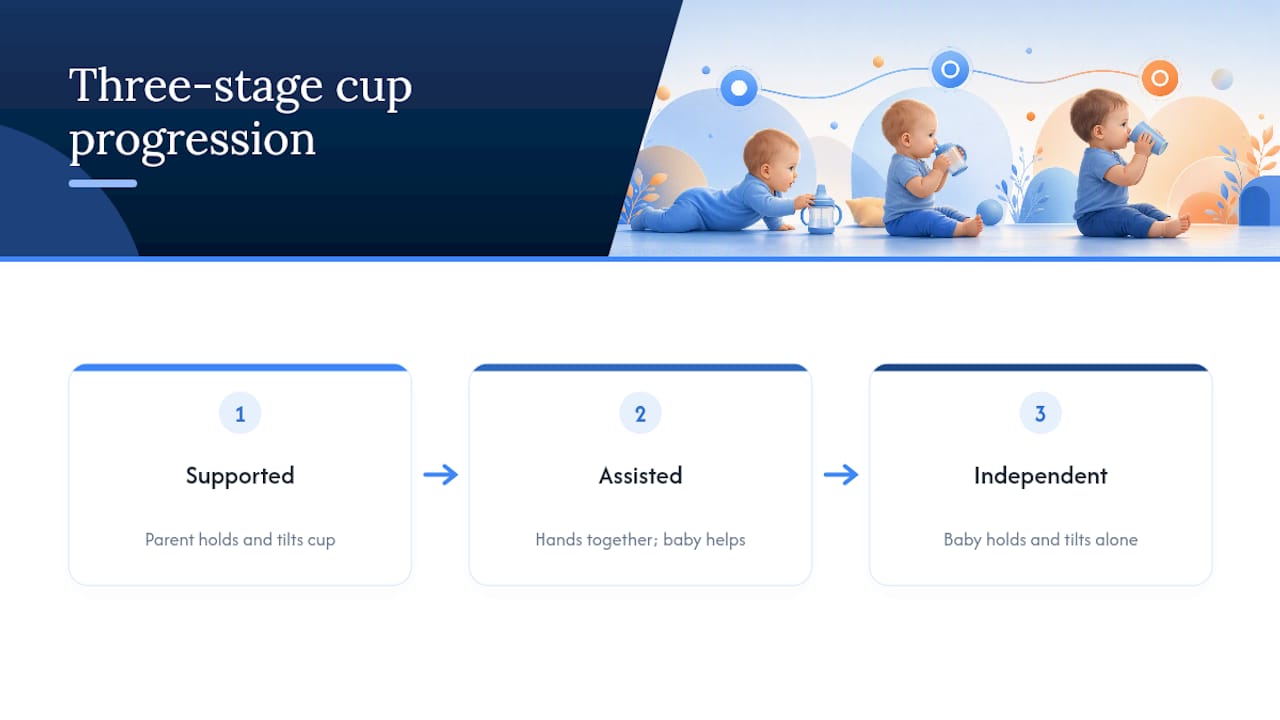
Progress tends to move through three rough stages. In the supported stage, you hold the cup fully and control every tilt. In the assisted stage, your baby's hands join yours on the cup, and they start anticipating the tilt themselves. In the independent stage, they hold and tilt the cup alone, though spills still happen when they get excited or distracted. Most families see the shift from supported to assisted within a few weeks of steady practice, and independent sipping with minimal spilling often takes several months to consistently show up.
Pro Tip: Introduce a straw cup around the same time as the open cup rather than one after the other. Alternating between the two in the same week seems to help babies generalize the sipping motion faster than sticking to a single cup style, because each one demands a slightly different mouth pattern.
Troubleshooting Common Open Cup Problems
Every family hits a snag somewhere in this process. Here's what actually fixes the most common ones.
- Constant spilling. Cut the fill amount in half, switch to a cup with a wider, weighted base, and hold the rim slightly lower on the lip so gravity does less work against you.
- Flat refusal or a strong bottle preference. Alternate cup styles across the week, let your baby handle an empty cup during play so it feels familiar, and try removing the valve from a sippy cup to nudge a sip instead of a suck.
- Poor grip or slow motor progress. Support the cup with two hands longer than feels necessary, choose a textured or two-handled cup, and keep individual practice doses small rather than pushing for a full cup at once.
- Coughing or gagging beyond the occasional sputter. Mild coughing during the learning phase is common. Frequent gagging, choking, or visible distress with liquids is not, and it's worth a conversation with your pediatrician or a feeding specialist rather than waiting it out.
Most of these issues resolve within a couple of weeks of small, consistent adjustments. If the same problem is still happening after a month of steady practice, that's useful information, not a failure on your part.
What Should Go in the Cup? Oral Health and Beverage Guidance
The training cup itself matters less for dental health than what's inside it. Offer water between meals, and reserve milk for mealtimes only. Juice, if you offer it at all, belongs at the table too, not sipped throughout the afternoon.
The reason is straightforward: teeth exposed to sugar or milk sugars for hours at a stretch face far more decay risk than teeth exposed briefly at set mealtimes. Roaming sippy cups filled with milk or juice are a well-documented driver of early childhood cavities, largely because a valved spout lets a toddler carry the cup around all day without anyone noticing how much time their teeth spend bathed in liquid sugar. An open cup used only at the table naturally limits that exposure, since it isn't practical to wander around holding an unlidded cup without spilling it.
If your child already has early tooth discoloration, sensitivity, or you're unsure how their current cup habits stack up, bring it up at their next pediatric dental visit rather than guessing.
When Cup Training Signals a Need for Feeding Therapy
Most cup struggles resolve with time and repetition. A smaller number point to something worth a professional look. Watch for:
- No progress at all after several weeks of consistent, daily practice
- Frequent coughing, choking, or visible distress when liquid enters the mouth
- Oral-motor patterns that seem stuck, such as an inability to move the tongue independently of the jaw
- A child who refuses all liquids from any cup, not just a preference for the bottle
Thriving Joy's feeding therapy team evaluates exactly these patterns, starting with a full assessment of oral-motor strength, swallow safety, and current feeding habits. From there, families get an individualized plan built around measurable, small goals, often something as specific as three supported sips per meal across five meals a week, plus direct coaching so parents know how to run practice at home between sessions. A first consult usually focuses on realistic short-term targets rather than an overnight fix, and most families see momentum within a few weeks of starting.
A Therapist's Short Note to Parents
Patience does more here than any cup or technique. I've seen families come in convinced their child is "behind" after two weeks of spills, when what they're actually watching is a completely normal learning curve. Small wins count: one held sip, one tilt without a full soak. Track those instead of the mess. If weeks turn into months with no shift at all, that's the moment to reach out to a feeding specialist rather than keep guessing on your own.
How Thriving Joy Can Help
If cup training has stalled well past what feels like a normal learning curve, or your child shows real difficulty coordinating swallows, a feeding evaluation gives you clear answers instead of more guesswork at home. Thriving Joy is a local option in the Tampa area built specifically for this: individualized assessment, a concrete practice plan, and direct parent coaching, so you're not troubleshooting spills and refusals alone.
The team works with families across the full arc of feeding development, from early bottle-to-cup transitions through more complex oral-motor delays, and sessions are covered by many major insurance plans as well as private pay. If you've been tracking weeks of little to no progress, or you just want a professional set of eyes on your child's technique, book a feeding therapy evaluation and get a plan built around your child's specific pattern rather than a generic timeline.
Sources
- Straw, sippy, or open cup: which is best for teeth? — SayCheez Dental
- Helping your child embrace the open cup — Northern Health Stories