

Yes, most babies can wean off a nipple shield using a gradual, low-pressure plan built around three moves: pumping briefly to trigger let-down before feeds, practicing mid-feed shield removal, and tracking wet diapers and weight along the way. If your baby pulls away or gets upset, go back to the shield and try again later. If diaper counts or weight gain look off, call an IBCLC.
TL;DR:
- Most babies can be successfully weaned off a nipple shield within a few weeks with a gradual plan emphasizing low-pressure techniques.
- Pump briefly before feeds to trigger let-down and practice mid-feed shield removal during calm, alert moments to ease the transition.
- Proper latch positioning and skin-to-skin time help improve direct breastfeeding without the shield, especially when baby is calm and receptive.
- Monitoring diaper output, weight gain, and swallowing cues is critical to ensure your baby receives enough milk during weaning.
- Reverting to the shield after setbacks is normal; consulting a lactation specialist should be considered if weight gain stalls or if persistent feeding issues occur.
Table of Contents
- What Does Nipple Shield Weaning Actually Involve?
- How Do You Wean a Baby Off a Nipple Shield Step by Step?
- When Is the Right Time to Start, and How Long Does It Take?
- What Latch and Positioning Changes Help Without the Shield?
- How Do You Know Your Baby Is Getting Enough Milk?
- What If Weaning Doesn't Go Smoothly?
- When Should You Call a Lactation Consultant?
- A Clinician's Note on Patience
- Get Hands-On Support for Nipple Shield Weaning
- Where This Guidance Comes From
- Sources
What Does Nipple Shield Weaning Actually Involve?
Nipple shield weaning is the process of gradually reducing and eventually stopping the use of a thin silicone barrier between your breast and your baby's mouth during feeds. Most parents start using a shield in the first days after birth to solve a specific problem: a shallow latch, flat or inverted nipples, extreme nipple pain, or a premature baby who needs a firmer surface to organize sucking. It works. That's exactly why weaning off it later takes a plan instead of guesswork.
The tricky part is that a shield can quietly reduce how much milk your baby actually transfers, even after the original latch problem has resolved. Cleveland Clinic notes that shields are meant to be a short-term bridge, typically introduced once your milk has come in, not a permanent fixture. The goal isn't to rush your baby off it. It's to build a bridge back to bare-breast feeding at a pace your baby can handle, while you keep an eye on the numbers that tell you feeding is still going well.
How Do You Wean a Baby Off a Nipple Shield Step by Step?
Weaning works best as a series of small, low-stakes experiments rather than one dramatic switch. Here's a plan you can adapt to your baby's temperament and your own schedule.
- Pump for two to three minutes before the feed. This triggers your let-down reflex early and elongates your nipple slightly, giving your baby a stronger, faster flow the moment they latch bare. Children's Minnesota lists pumping to elicit let-down before feeding as one of the most reliable weaning tactics.
- Practice suck-training between feeds. Offer your baby a clean finger, pad-side up, and let them suck while you feel for tongue movement. A drop or two of expressed milk on your finger or nipple can make the sensation rewarding right away.
- Choose a calm, "in-between" feeding to try first. Not the 3 a.m. feed when your baby is frantic, and not right after they've fallen asleep. Aim for a moment when they're alert but not yet ravenous.
- Start with the shield, then remove it after let-down. Once milk is flowing well, slip the shield off mid-feed and offer the bare breast. Alternatively, try the second breast completely bare, since your baby is already fed and calmer by that point.
- Extend bare-breast time gradually. If day one goes well with thirty seconds of bare latching, try a full minute on day two, then work toward one full feed by the end of the week. There's no fixed script here. Some families need a few days; others need longer.
- Watch for stress signals and stop immediately if you see them. Arching, frantic head turning, or crying that escalates rather than settles means it's time to return to the shield without guilt.
Pro Tip: Keep a spare shield within reach during every practice attempt. Fumbling to find it while your baby is upset turns a minor setback into a stressful one for both of you.
Parental stress is one of the biggest hidden obstacles here. KellyMom's guidance on weaning is blunt about this: low-pressure practice beats forcing the issue, and reverting to the shield when your baby gets upset protects the positive association with breastfeeding you're trying to build.

When Is the Right Time to Start, and How Long Does It Take?
Mature milk generally arrives a few days after birth, typically within the first week, and that's usually when a shield's original job, compensating for a shallow latch or flat nipple while your supply is still establishing, starts to matter less. Once feeding has stabilized and your baby is gaining weight steadily, you have a reasonable window to begin weaning.
Timelines vary more than most parents expect. KellyMom reports a range from about two days to four or five weeks for successful weaning, and where you land in that range depends on a few factors:
- Baby's age and the original reason for the shield. A baby who needed the shield briefly for a mild latch issue tends to wean faster than one who needed it for weeks.
- Prematurity. Preemies often need more time to build the oral strength for bare-breast feeding.
- Underlying latch issues or tongue tie. These need to be identified and addressed, not just practiced around.
- Bottle use. Babies who alternate between bottles and breast sometimes take longer to adjust to breast tissue's softer, less predictable shape.
Pick your practice windows carefully. A baby who is overtired or ravenous has no patience for a new sensation; a baby who's too sleepy won't engage enough to learn. The sweet spot is calm alertness, not a full stomach and not an empty one.
What Latch and Positioning Changes Help Without the Shield?
Bare-breast latching often fails for the same physical reasons the shield became necessary in the first place, so a few positioning fixes go a long way.
- Go belly-to-belly. Your baby's chest should face yours directly, with their head, shoulders, and hips in a straight line, not twisted to reach the breast.
- Wait for a wide-open mouth before pulling them in. A narrow, hesitant latch is the number one cause of pain and poor transfer.
- Watch for chin-to-breast contact and flanged lips. If the bottom lip is tucked in rather than flared out, break the latch and try again.
- Compress your breast slightly as you offer it. This mimics the firmer shape your baby is used to from the silicone shield and can make the transition feel less foreign.
- Try a bare latch when your baby is sleepy and calm rather than mid-cry. Drowsy babies are often more willing to experiment with an unfamiliar sensation.
Pro Tip: Skin-to-skin time before feeds, even five minutes on the couch with no shirt between you, primes your baby's rooting reflex and makes the bare latch feel like a natural next step instead of a sudden change.
How Do You Know Your Baby Is Getting Enough Milk?
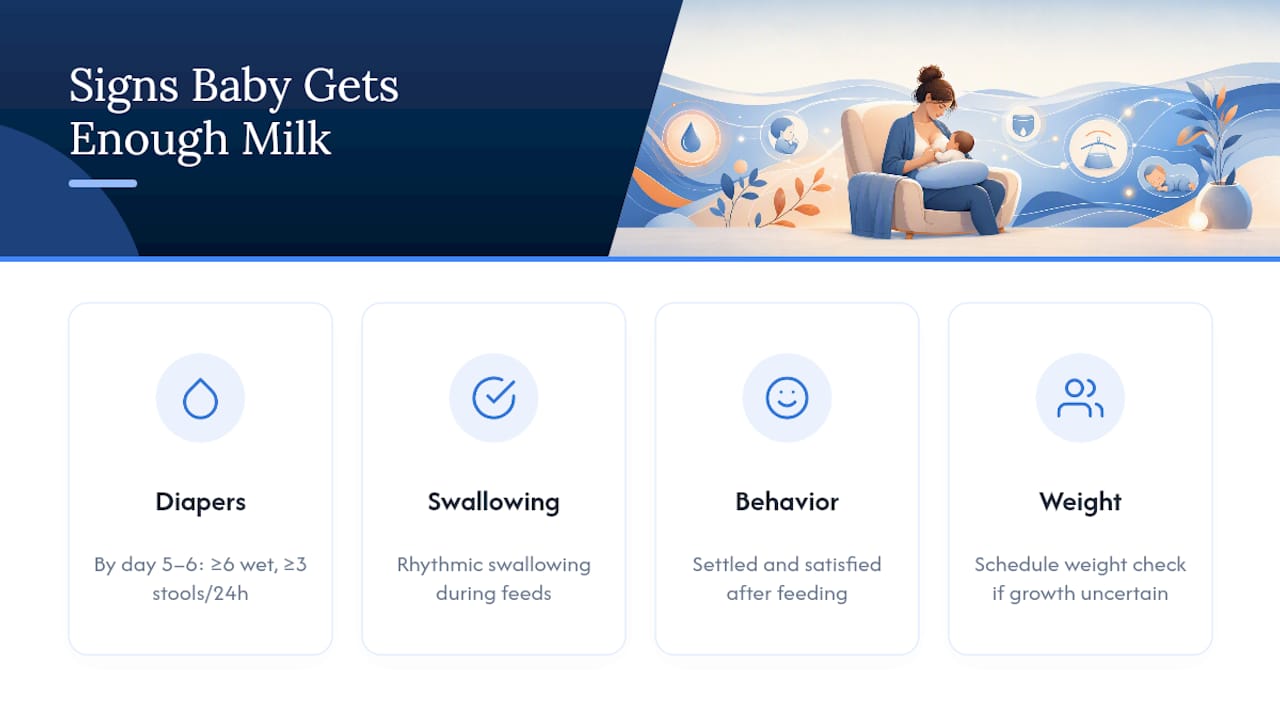
Diapers tell most of the story. By day five or six, expect at least six wet diapers and three or more stools in 24 hours, with output climbing as your baby grows. Listen for rhythmic swallowing during feeds, a sign your baby is actually transferring milk rather than just comfort sucking, and watch for a baby who seems settled and satisfied afterward rather than fussy and still rooting.
If transfer looks weak during a weaning attempt, pump right after the feed to fully empty the breast and protect your supply.
A PubMed Central review of nipple shield research notes that reduced milk transfer is a documented concern with extended shield use, which is exactly why tracking diapers and weight during weaning matters.
Schedule a weight check with your pediatrician if you're ever unsure whether your baby is gaining well between visits.
What If Weaning Doesn't Go Smoothly?
Setbacks are common, and almost none of them mean you need to abandon the plan entirely.
- If your baby gets upset or refuses the bare breast, stop, offer comfort, and try again at a different feed later that day or the next. Forcing it tends to backfire.
- If milk transfer seems low or weight gain slows, pump after every feed to protect your supply and get in touch with an IBCLC for a hands-on assessment.
- Watch for mastitis or a plugged duct, especially if you're pumping more during this transition. Fever, localized pain, or a red, swollen area on the breast are signals to contact your doctor promptly rather than waiting it out.
None of these setbacks mean weaning has failed. They're information that tells you to adjust pace, technique, or who's involved in the plan.
When Should You Call a Lactation Consultant?
A handful of signs mean it's time to loop in professional support rather than keep troubleshooting alone: slow weight gain, consistently fewer wet diapers than expected, ongoing nipple pain, or any suspicion of an oral motor issue like tongue tie.
An IBCLC assessment typically includes watching a full feed to observe the latch directly, checking your baby's mouth for tongue tie or other structural issues, sometimes weighing your baby before and after a feed to measure actual transfer, and reviewing your feeding history to spot patterns you might have missed. From there, you should leave with a specific practice plan, a follow-up weigh-in scheduled, and hands-on coaching rather than a generic handout. If you're noticing red flags around feeding beyond the shield itself, that's worth mentioning at the same visit.
A Clinician's Note on Patience
Setbacks during weaning are data, not failure. Thriving Joy's family-centered approach treats every stalled attempt as information to adjust the plan, not a reason to panic. If you want hands-on coaching through this, reach out. We're here.
— Jamie
Get Hands-On Support for Nipple Shield Weaning
Reading a step-by-step plan is one thing. Having someone watch your baby latch and tell you exactly what to adjust in real time is another. Thrivingjoy's lactation counseling gives you that second option: a lactation consultant who observes an actual feed, checks for tongue tie or oral motor issues, and measures whether your baby is transferring enough milk before you're left guessing at home.

A first appointment typically includes a full feeding assessment, hands-on latch coaching while you're still in the room, and a written home plan tailored to your baby's specific pattern, not a generic printout. If feeding challenges go beyond the shield itself, our feeding therapy services can dig into the root cause rather than just managing the symptom. Families dealing with breastfeeding after breast surgery may also find this partner guide on nursing post-augmentation useful context before their visit. Ready to get a plan built around your baby? Book a lactation counseling session and bring your questions with you.
Where This Guidance Comes From
This plan draws on KellyMom's weaning guidance for pacing and timelines, Cleveland Clinic's clinical overview for why shields are short-term tools, Children's Minnesota's technique guidance on safe handling, and Northwestern Medicine's patient handout on monitoring intake.
Sources
- Weaning off of nipple shields — KellyMom
- Nipple shield — Cleveland Clinic
- Nipple shields — Children’s Minnesota
- Northwestern Medicine — nipple shields handout (PDF)